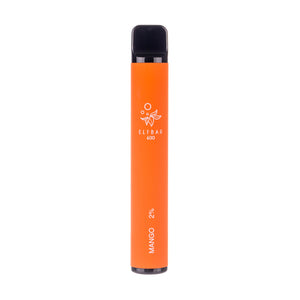
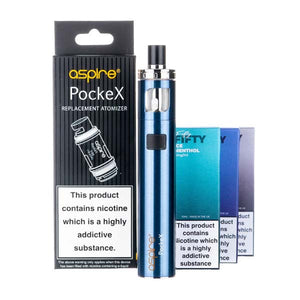
Like anything, vaping attracts both those with a casual interest, often as a means to quit smoking, as well as keen hobbyists. For the former, there are plenty of starter kits and easy to use vaping gadgets but the latter need much more than a simple kit to satisfy their interest.
What Is A Vape Coil?
The vape coil is a lot like the heart of your mod or e-cigarette kit, it’s the unit responsible for heating up the e-liquid and vapourising it. The coil resistance can be adjusted according to how many wraps of a wire there are, the gauge and type of wire. You’d then measure this resistance with the help of an Ohmmeter. Low resistance coils produce warmer vapour and larger clouds, whereas high resistance coils produce a cooler vape with less current. The resistance of the coil element will determine which types of e-liquid to vape.
Despite being so integral, the coil is a fairly simple mechanism. It’s constructed from a coiled wire or a piece of mesh and some wicking material (usually cotton). There are plenty of different wires and wicking materials to choose from and the best one for you really depends what you want to get out of your vaping experience.
Different Vape Coil Types
Whether you’re using a pre-made coil or are building your own, there are a few things to consider. Some brands will have both a ceramic and cotton option and occasionally use other materials including flax and wood pulp as a wicking material. Each of these have different effects on flavour and cloud production. The same rule applies when you build your own coils as different metals have different properties in terms of ramp up time, flavour and which mode they can be used in.
Ceramic Coil
A ceramic coil material is porous, so air passes through it particularly well and offers a super smooth draw. Many reviewers find that the ceramic material brings out the flavour more than other materials. They tolerate high wattages well too so they’re a great addition to the more high-powered mods on the market. Ceramic coils have also been touted to last longer than cotton coils and help prevent dry hits.
Stainless Steel Coil
There has been a lot of debate around what kind of stainless steel is actually stainless steel, mostly because there are multiple different “grades” you can buy. 430-grade stainless steel wire is known for its magnetic properties and for being durable and long-lasting, but most grades of stainless steel will be similarly tough. When it comes to building, stainless steel is one of the most versatile metals as you can use it temperature control mode or wattage mode. Apparently if you look after it very carefully, a stainless steel coil can last for 25 years.
Titanium Coil
Titanium wires are particularly soft and malleable making them easy to handle, twist and cut. This does make it slightly more expensive than its stainless steel equivalent, but that hasn’t stopped it from becoming an increasingly popular material. Titanium provides an especially clean and crisp tasting vape but there has been a lot of discussion around how safe it is. Titanium is used in fireworks to create white sparks and is more flammable than other coil materials, so vapers need to handle it with care. It’s only compatible with temperature control mode so you need to consider the temperature carefully, but many mods offer a “TC Ti” mode especially for these coils.
Kanthal Coil
Kanthal is a combination of iron, chromium and aluminium and is a popular wire used in both pre-made and home made coils. It has a super quick ramp up time and as such, creates impressive amounts of vapour. Kanthal coils are only suitable to be used in wattage mode. However, it’s a soft and easy to work with wire whilst also holding its shape nicely, making it a popular option to work with for many vapers.
Nickel Coil
The number of nickel wires on offer can be dizzyingly confusing, so look out for Ni200 wire, which is a 99.6% nickel alloy. Many temperature control mods prioritise nickel coils over other materials because it’s great for low resistance. There are some things to be aware of though – nickel coils should never be dry fired for too long, and they’re not suitable for variable voltage or variable wattage kits either. Some people can have also an allergy to Nickel (the same way they can be allergic to Nickel jewellery).
Nichrome Coil
Nichrome is exactly what it says on the tin – 80% Chromium and 20% Nickel. This alloy heats up much quicker than Kanthal, offering a reliable amount of cloud production and a pleasant, warm vape. It also protects the heating element from oxidation, which can change the colour and even taste of your e-liquid. Nichome can only be used in wattage mode. This combined with its quick ramp up time makes it another popular choice with Sub Ohm vapers.
Mesh Coil
Mesh coils, like the QUAQ Mesh Coils, have revolutionised the vaping experience for many users. Unlike traditional wire coils, mesh coils feature a larger surface area that allows for more e-liquid to be vaporised simultaneously. This results in richer and more intense flavours, making every puff a delightful experience. Whether you're a fan of fruity, dessert, or tobacco-inspired flavours, the Mesh Technology ensures that the taste is always at its peak.
In addition to the enhanced flavour profile, one of the standout features of mesh coils is their consistent vapour production. The unique design of the mesh coil ensures that heat is evenly distributed across its surface. This uniform heating eliminates the risk of dry hits, which can be a common issue with traditional wire coils. As a result, vapers, whether beginners or seasoned enthusiasts, can expect a reliable and satisfying vaping experience every time.
Vape Coils - Ohms
As we all know, the Ohm level measures electrical resistance, which influences affects taste and cloud production. When you’re building your coils it’s crucial that you measure the resistance with an Ohmmeter for your own peace of mind, safety and to make sure you create the desired vaping experience.
A Sub Ohm Coil
A lower resistance will provide warmer vapour, a slightly drier hit, and bigger clouds. The downside is that you’re going to use your e-liquid more quickly and typically you need to vape at a higher wattage meaning your 18650 li-ion battery will drain faster.
A Plus Ohm Coil
The benefits of a higher resistance coil are much more steady battery use, a cooler vape and less vapour. This of course is all a matter of preference. If you’re keen on big clouds then you can forgive draining battery life (or just keep a few spares on you). If you prefer a vape that lasts all day, you’ll probably be better off with a higher resistance coil.
When To Change A Vape Coil
Depending on the heat levels and the frequency of use, your coils won’t last forever. The PG/VG of your e-liquid can burn it out faster, as can the wattage and voltage that you use. If you’re a very frequent vaper, and you’re putting your equipment through the ringer, you’re obviously going to need to change the coil more often. High wattage, sweet flavours and a high VG e-juice (usually factors in cloud chasing) will burn through coils and wicking material faster.
The best way to educate yourself on changing your vape coils is to use the various YouTube tutorials on the topic, because they offer a visual guide too.
How Long Does A Vape Coil Last?
Heavy vapers: A very heavy vaper should change their coils every week. This might sound like a lot, but it’s worth it. The flavour of your e-liquid, cloud production and functionality of your vape will suffer if you neglect it. This rule is especially relevant for Sub Ohm vapers as they typically use higher VG liquids which are thicker and gum up coils more quickly.
Moderate vapers: Vapers who vape consistently throughout the day but only take a couple of drags at a time can get more use out of a coil as it isn’t getting as hot as frequently. Again, the type of juice you use and the power of your device will be a factor in this but the general rule here is about once a fortnight.
Light vapers: Infrequent use, or a few hits here and there, suggests that your coils will only need to be changed every 3-4 weeks. If you’re using mouth to lung devices with the higher PG value this also helps extend the lifespan of your coil.
How Do You Know When To Change A Coil On A Vape?
One of the first indications is going to be a burnt or diminished taste in your vapour. The reason for this is that the tank is running too hot for the coil to manage it. Sometimes chain vaping can also affect the lifespan of your coil as it can get too hot and start to burn the coil. If you inspect your coil and wicking material more closely, you’ll see that the cotton is often discoloured and burnt.
Burnt wicking material won’t absorb the e-liquid properly and will negatively affect the quality of flavour and amount of vapour production. Another culprit of this is your e-liquid. Even if you aren’t chain vaping, high VG liquids are thick and naturally quite sweet and they sort of ‘caramelise’ on the wicking material. This stops them working effectively and means you’ll need a change.
A leaking device is also worth taking note of. There are many reasons for this and they all need to be paid attention to. If it’s the result of a damaged coil you will find that the ramp up on them isn’t working properly and there may be a gurgling sound when you inhale. It also happens when the cotton can’t absorb e-liquid efficiently anymore so when you fire the device or leave it sitting around it can leak.
If you ignore the signs or aren’t aware of them you might find that your mod or kit stops producing vapour entirely. You might even get some e-liquid spit-back in your mouth while you inhale, which doesn’t taste anywhere near as nice as the flavoured vapour does. As soon as you notice the signs of an old coil, check it out and replace it.
How To Change A Vape Coil
Each piece of equipment varies. Some coils can just be pulled straight out and others need to be unscrewed. However, there are a few general steps you can follow regardless of which variety you have when you’re replacing an old coil.
-
Unscrew the battery from the tank.
-
Turn the tank upside down and unscrew the metal bottom cap.
-
Unscrew the coil head from the bottom cap and screw the new coil into it.
-
Put a drip of e-liquid onto each of the wicking ports on the new coil (the exposed parts of cotton you can see). This helps prime the coil and reduce the time needed before you can vape without getting a dry hit.
-
Reassemble your tank and fill with e-liquid. (Try to avoid getting e-liquid into the center airflow metal tube, this will affect the functionality and waste your e-liquid!)
-
Check for any leaks or spills and once you’re happy it’s airtight and clean, put the tank back on your battery.
-
Wait a couple of minutes for the e-liquid to saturate the wicking material inside the coil before vaping.
How Do I Make My Own Coil?
Making your own coil can be complex and may involve a degree of trial and error. However, there are some things that you need to be certain of before you vape on a coil you made yourself. One of the most crucial things you need is an Ohmmeter, it’s not advisable or possible to build your own coils safely without one.
What Do I Need To Build A Vape Coil?
-
An Ohmmeter
-
An RDA or RTA
-
Resistance Wire: Kanthal, stainless steel or NiChrome are popular options but make sure you choose the right one for the mode you vape in. E.g. if you want to use temperature control, make sure you’ve chosen a wire that’s compatible with TC mode.
-
2mm screwdriver (this is included with most RDAs) or 2mm drill bit
-
Tweezers (preferably ceramic tipped), needle nose pliers, or forceps
-
Screwdriver or Allen key that fits your RDA’s screws
-
Small wire cutters or nail clippers
-
Butane or propane torch
-
Scissors
-
Wicking Materials: organic cotton (there are plenty of different brands to choose from)
-
E-liquid
Getting Started:
Oxidise the wire: Cut a 4-5 inch piece of wire, hold one end with tweezers or pliers and heat the wire at the other end until it glows orange. Slowly move the flame down the length of the wire until it all glows orange. Then swap sides and repeat the same steps. This will make the wire much easier to work with.
Wrapping the coil manually:
You’ll need your tweezers to do this because the wire will still be hot. Get your small screwdriver and start to wrap the wire around it, starting in the middle rather than the end. You need to wrap it tightly around the screwdriver 4 to 8 times. The number of wraps will affect the resistance, more wraps will result in a higher resistance. When you’re done wrapping, both ends of the wire should be pointing in the same direction. Count the number of wraps just to double check and don’t remove the coil from your screwdriver just yet. If you’re making a dual-coil built it’s important the coils both have the same number of wraps and equal resistance.
If you don’t want to wrap manually, you can use the Kuro Coiler to create your own wraps easily.
Installing the coil:
Loosen the post screws on your build deck, but don’t remove them entirely. Take your coil – which is still on the screwdriver – and place one end into the positive hole and the other into the negative. You can use your screwdriver to position the coil in the center of the RDA and it will help you be much more precise and delicate. Tighten the screws once it’s in position, but don’t tighten them too much as it could cut the wires. You want it to be firm and secure, without being too tight that it’s difficult to remove.
How Does The Number Of Wraps Affect My Coil?
The more wraps, the higher the resistance, which goes on to affect flavour and cloud production. 8 wraps is a good starting point, but you can wrap your wire around more times if you want a different resistance. There are a lot of factors that go into this including the wire you use and the gauge. Experiment with an Ohmmeter to find the right resistance for you.
How Do I Check The Ohms?
When your RDA has been got its coil installed and it’s looking good, screw it onto the Ohmmeter. This will read the resistance and let you know if you have any shorts. It’s normal for coils to vary a little bit when they’re measured, but as long as you get the correct reading within 0.2ohms, you’re good to go. To make sure your reading is as accurate as possible, make sure your RDA or atomiser is screwed in tightly when you’re measuring resistance.
If your Ohms reader is giving you a different reading to what you want, and there’s a difference of more than 0.2ohms, you need to fix whatever the problem is. Unfortunately the Ohmmeter isn’t a diagnosing tool. It’s a lot like a guitar tuner – it tells you what the reading is but it’s up to you to adjust it. Most coil issues are easy to fix, but you might have to exercise a little bit of trial and error, or even rebuild the coil again from scratch.
It’s essential that you pay attention to what your resistance reading is and address it if there’s any discrepancy. If it’s incorrect it could damage your equipment, and in extreme cases it could even set on fire!
How To Clean A Vape Coil
Depending on the VG and PG level of your e-liquid, your coils can get a little bit messy and build up a layer of what can only be described as gunk. One of the easiest way to clean this is called ‘dry burning’, and it’s a lot easier than it sounds.
First, remove the wicking material from your rebuildable coil. Then, heat the coil in 2 second bursts by “pulsing” the firing button on your mod until you can see them glowing orange. Vapour will start to form (this is the gunk being burnt on the surface of the coil) which can then be blown away.
Once the gunk is all gone, let the coil cool down again, give it one last blow and you’re ready to go. Rewick and drip onto the coil and you can start vaping again. The first few hits might not taste entirely normal, but that’s just the coil getting back into the swing of things.
What Kind Of Tank Should I Use With My Coil?
Unbelievably there was a time when you couldn’t change your own coils. More modern atomisers have made it possible and it opened up a world of rebuilding and customisation.
Top and bottom coil: Tanks have either a bottom-coil or top-coil design. If the coil is at the top, it requires less wicking material and is the design you usually find in rebuildable atomisers. Liquid is absorbed from wells or dripped directly onto the cotton to be vaped. Bottom-coil is more commonly associated with replaceable coils and absorb e-liquid from wicking holes in the coil.
Dual coil: Dual coil atomisers are another new one, using an equal amount of electricity to both coils, lowering the overall resistance. These use a lot of power, so the question is more ‘which battery do I need?’ rather than ‘which tank do I need?’. RDAs have different kinds of decks, some of them are equipped for dual or even triple coils allowing for even greater vapour production.
Vertical coil: Vertical coils are starting to overtake dual coil because the coil is extended upwards, dramatically improving flavour and vapour production. One of the newest examples is the Aspire Cleito Exo vape tank.
www.vapesuperstore.co.uk contains general information about vaping and vapour products. The information provided is not medical advice, and should not be relied upon unless explicity cited. We do not make any warranties surrounding the health benefits, reliability and accuracy of written copy across all pages on our website, including blog content and content posted on social media.


